30 July 2009

Challahback Girl

I think my big city snobbery is wearing thin on my friends and family here at home. 'What do you mean the library's closed Sundays AND Mondays?' 'What do you mean the traffic lights turn off after midnight?' 'What do you mean there's no Jewish bakery??' The last one however can be compensated for. St. Viateur Bagel from Montreal (the best of all the bagels, in my opinion) delivers to a local grocery store, making for easier access than in Toronto. As soon as I have access to a freezer of my own aka when I sort of grow up, it will be stocked with mail-ordered bagels, ice cream and booze. Somewhat surprisingly, I am not in fact obese.

But bagels are only one part of the equation. Homemade challah is something I've made several times and never falls short of delicious.

Challah (Cook's Illustrated)
  • 3 1/4 cups all-purpose flour, extra for dusting workspace
  • 1/4 cup sugar
  • 1 envelope (2 1/4 tsp) instant yeast
  • 1 1/4 tsp salt
  • 2 large eggs + 1 yolk
  • 4 tbsp/1 stick/56 g unsalted butter, melted (I hate butter conversions)
  • 1/2 cup + 1 tbsp hot water
  • 1 egg white
  • 1 tsp poppy or sesame seeds (optional, but adds deliciousness)
1. Whisk together 3 cups flour, sugar, yeast and salt. Mix together 2 eggs, yolk, melted butter, and 1/2 cup water in bowl of standing mixer fitted with dough hook (if a KitchenAid mixer with all the attachments is the only reason you would get married, except possibly for EU citizenship, and that day has yet to come, use your hands-it works for me). Add flour mixture to wet mixture; knead at low speed until dough ball forms, about 5 minutes, adding remaining 1/4 cup flour, 1 tablespoon at a time, as needed to prevent the dough from sticking (this will take a bit longer by hand). Whisk reserved egg white with remaining 1 tbsp water in small bowl, cover and refrigerate.
2. Transfer dough to lightly oiled large bowl, turning dough over to coat with oil. Cover with plastic wrap and let rise until doubled in size, 1 1/2 to 2 hours. Gently press dough to deflate, cover with plastic wrap, and let rise until doubled in size again, 40-60 minutes. (Rising will go quicker in a warm area, I always end up sticking the bowl on top of the fridge-warm air rises and all that)
3. Lightly grease large baking sheet and set aside. Transfer dough to lightly floured workspace. Divide dough into 2 pieces, one roughly half the size of the other. Divide large piece into 3 equal pieces. Roll each piece into 16-inch rope, about 1 inch in diameter. Line up ropes side by side and pinch ends together. Braid, and pinch other ends together. Place braid on baking sheet. Do the same with the smaller piece of dough, brushing some of the egg white mixture on the top of the larger braid before placing smaller braid on top, as shown. Loosely drape loaf with plastic wrap and let rise until loaf becomes puffy and increases in size by one third, 30-45 minutes.
4. Heat oven to 175˚. Brush loaf with remaining egg wash and sprinkle with poppy or sesame seeds, if using. Bake until loaf is goldern brown and instant-read thermometer inserted into side of loaf reads 190˚, 30-40 minutes. Place baking sheet on wire rack. Cool loaf completely before slicing.

27 July 2009

Green Tea Ice Cream

Damn, matcha powder is expensive. It compensates by being absurdly potent, I guess. After sushi comes green tea (or red bean, or sometimes mango or ginger) ice cream, and I knew this was one step of the sushi experience I could recreate.

Once again I am using the Perfect Scoop as my ice cream bible, it has yet to wrong me.

Green Tea Ice Cream

  • 1 cup whole milk
  • 3/4 cup sugar (don't skimp, you could even add a bit)
  • pinch of salt
  • 2 cups heavy cream
  • 4 tsp matcha powder (can be found in fancy supermarkets/tea shops/asian groceries)
  • 6 large egg yolks
Warm milk, sugar and salt in a medium saucepan. Pour cream into a large bowl and whisk in matcha powder. Set a mesh strainer on top.
In a separate medium bowl, whisk together the egg yolks. Slowly pour the warm mixture into the egg yolks, whisking constantly, then scrape the warmed egg yolks back into the saucepan.
Stir constantly over medium heat until you reach custard consistency, coating the spatula. Don't let it boil! Pour the custard through the strainer and stir it into the cream, whisking vigorously to dissolve the matcha. Stir until cool over an ice bath.
Chill in the refrigerator overnight, and freeze according to your machine's intructions.

25 July 2009

Strawberry Shortcakes

Strawberry season is coming to an end so you should be able to get lots of delicious berries for cheap, perfect for baking.

The biscuits are not that fussy and a huge improvement over supermarket yellow/orange-y sponge 'shortcakes'. Whipped cream is pretty much whipped cream, no real need to DIY. You can macerate the berries and prep the dough before dinner, whip the cream while they're baking and have them assembled within 1/2 an hour.


From Baking Illustrated: Serves ~8

Fruit
  • 8 cups strawberries (~2 1/2 pounds), hulled
  • 6 tbsp sugar
1. Place 3 cups of the hulled strawberries in a large bowl and crush with a potato masher (or spoon). Slice the remaining 5 cups berries and stir into the crushed berries along with the sugar. Set the fruit aside to macerate for at least 30 minutes and up to 2 hours.

Shortcakes
  • 2 cups all-purpose flour+extra for dusting workspace
  • 5 tbsp sugar
  • 1 tbsp baking powder
  • 1/2 tsp salt
  • 8 tbsp cold unsalted butter, cut into 1/2-inch cubes
  • 1 large egg, lightly beaten
  • 1/2 cup plus 1 tablespoon whole milk or half-and-half
  • 1 large eggwhite, lightly beaten
1. Heat oven to 425˚. In a food processor (or by hand) mix the flour, 3 tbsp of the sugar, baking powder and salt. Scatter the butter pieces over and process (or mix) until the mixture resembles coarse meal, about 15 1-second pulses. Transfer to a medium bowl (if using a processor, duh).
2. Mix the beaten egg with the whole milk in a measuring cup. Pour the egg mixture into the bowl with the flour mixture. Combine with a spatula until large clumps form. Turn the mixture onto a floured workspace and lightly knead until it comes together.
3. Use your fingertips to pat the dough into a 9 by 6-inch rectangle about 3/4 inch thick, being careful not to overwork the dough. Flour a 2 3/4 inch biscuit cutter and cut out 6 dough rounds (you can probably get a couple more). Place the rounds 1 inch apart on a small baking sheet, brush with the beaten egg white, and sprinkle the remaining 2 tbsp sugar. (Dough rounds can be covered and refrigerated for up to 2 hours before baking.)
4. Bake until the shortcakes are golden brown, 12-14 minutes. Place the baking sheet on a wire rack and cool the cakes until warm, about 10 minutes.

Whipped Cream: If you want to take a shortcut, this is the place-canned whipped cream, cool whip, etc., are all acceptable
  • 1 cup heavy cream
  • 1 tbsp sugar (superfine/confectioners preferred)
1. You will get better results if you chill the bowl and beaters in the freezer for at least 20 minutes before starting. Using a hand-held or stand mixer, combine the sugar and cream and beat on slow, then medium until it looks like the consistency of whipped cream. Taste and add more sugar if you want.

Assembly:
Spilt the shortcakes in half (they will likely have a slight natural crack). Place each bottom on a plate, spoon on some berries, then cream. Top with the tops. If you wanna get crazy but some more berries and cream up top, or venture into the world of multi-decker shortcakes if you dare. Serve immediately.

20 July 2009

Restrictions, schmrestrictions

Tonight I made dinner for a friend with both a gluten and lactose allergy. Thank god she is no longer vegetarian. Really, this isn't that limiting. I even made cookies for dessert (meringues) but they were less than photogenic so maybe I'll catch them on a repeat.

I barbecued sirloin medallions rubbed with rosemary, oregano, salt and pepper and olive oil.

The salad is awesome and often made. Even salad/vegetable haters love it. The dressing is key, if you're saving leftovers make sure to save dressing as well or plan to make more.

Chopped Salad (serves 8)

  • 2 large orange or red bell peppers
  • 2 ears fresh corn or 230g frozen kernels
  • 1 tbsp olive oil
  • kosher salt & ground pepper
  • 2 large ripe tomatoes, cored, seeded, cut into small dice
  • 1 small jicama (Mexican root vegetable, not a strong flavour but crunchy), peeled and cut into small dice
  • 2 large firm-ripe avocados, peeled, pitted and cut into small dice
  • 1 can black beans ~15 oz
  • fresh cilantro, coarsely chopped
Vinaigrette
  • Garlic, 1 small clove
  • 1/4 tsp Kosher salt
  • 45 ml lime juice
  • 45 ml orange juice
  • 1 shallot, finely chopped
  • Spoonful of honey
  • 4 ml cumin seed, toasted and finely ground
  • 60 ml extra-virgin olive oil
  • fresh ground pepper

1. Roasting peppers and corn (A): Position the rack in the centre of the oven and heat to 425˚. Line a heavy-duty rimmed baking sheet wil foil. Cut the peppers in half lengthwise and remove the stem, core, and ribs. Put the pepper halves on the sheet cut side down. Husk the corn and put the ears on the baking sheet. Drizzle the oil over the peppers and corn, and rub around to coat the peppers and kernels evenly. Sprinkle the corn with salt and pepper and roast in the oven until the peppers are soft and slightly shriveled and browned and the corn kernels are lightly browned ina few spots, about 20 minutes (rotate the corn occasionally as it toasts). Let them rest until cool enough to handle. Cut the kernels from the cobs. You should have about 1 1/2 cups. Scrape away the charred pepper skin and cut the flesh into small dice.

1. Stove-top roasting the peppers and frozen corn niblets (B): The peppers can be roasted on a screen over a stove-top gas burner over a high flame: keep turning until most of the skin is blistered. Put in a deep bowl and cover with a lid or plate until cooled enough to handle. When the vegetables are done, let them rest until cool enough to handle.
You can start from frozen corn kernels, pan-roasting them on the stove top in a cast-iron or non-stick frying pan on high heat. Add a bit of oil to the hot pan, add the corn frozen or thawed, and salt and pepper. Stir from time to time until a fair portion of the kernels are slightly browned.
Scrape away the charred pepper skin and cut the flesh into small dice.

2. Make the vinaigrette: Mince and mash the garlic to a paste with the slat. In a medium bowl whisk the garlic paste with the lime and orange juices, shallot, honey and toasted cumin. Slowly add the oil in a thin stream, whisking until well blended. Season to taste with black pepper and more salt and honey, if you like.

3. Chop all the salad ingredients up to 4 hours ahead and store them in separate covered containers in the fridge. Make the vinaigrette ahead as well if you want.

4. Assemble the salad: Artfully arrange strips of the corn, tomatoes, peppers, jicama, avocado and black beans on a small platter or other wide shallow serving dish. Sprinkle with the chopped cilantro. Serve the vinaigrette in a pitcher. Encourage guests to spoon elements of the salad onto their plates and drizzle on some of the vinaigrette. Or drizzle the vinaigrette over the whole salad just before serving.

(obvi my dad's writing)

So yes, a lot of prep work, chopping practice, but basically simple, looks impressive, tastes awesome, great summer-y food.

18 July 2009

Raspberry Swirl Ice Cream

From David Leibovitz's The Perfect Scoop.

The ice cream-maker possibly older than I am started to show it's age during this operation-motor stalling, strange noises. Thankfully it made it through.

This ice cream is divine, and luckily I bought enough extra berries to eat some Amélie-style before getting started. Like most ice creams, I started making the custard the night before so it could chill for 8+ hours.


Ice Cream (night before)
  • 1 cup whole milk (homo milk in Canada)
  • 2/3 cup sugar
  • Pinch of salt
  • 1 1/2 cups heavy cream (whipping cream)
  • 5 large egg yolks (this means meringues coming up soon)
  • 1/2 teaspoon vanilla extract
1. Warm the milk, sugar, and salt in a medium saucepan. Pour the cream into a large bowl and set a mesh strainer over the top.
2. In a separate medium bowl, whisk together the egg yolks. Slowly pour the warm milk into the egg yolks, whisking constantly, then scrape the warmed egg yolks back into the saucepan.
3. Stir the mixture constantly over medium heat with a heatproof spatula, scraping the bottom as you stir, until the mixture thickens and coats the spatula. Pour the custard through the strainer and stir it into the cream. Add the vanilla and stir until cool over an ice bath (put bowl into larger bowl filled with ice/ice water). Chill thouroughly (ideally overnight) in the refrigerator.

Raspberry Swirl
  • 1 1/2 cups raspberries
  • 3 tablespoons sugar
  • 1 tablespoon vodka (tempura, ice cream, who knew?)
1. An hour or so before churning the ice cream, make the raspberry swirl by mashing the raspberries together with the sugar and vodka with a fork, until they're juicy but with nice-sized chunks of raspberries remaining. Chill until ready to use.

Go Time
1. Freeze the ice cream custard in your ice cream maker (in my case, this means buying a bag of ice, crushing it up, packing the ice cream maker with said ice and coarse salt, and putting the custard in the inner container to churn.) As you remove it from the machine, layer it in the container with spoonfuls of the chilled raspberry swirl mixture.

17 July 2009

Breakfast for dinner

Possibly the ultimate lazy/delicious dinner: breakfast. The meal so nice I ate it twice.

Poached eggs on toast + bacon=heavenly and ready in 5 minutes. Poached eggs have become my thing lately. My mom always ate them and the texture grossed me out, I preferred my 'scrambled egg on toast', not really scrambled eggs but an egg fried into toast shape and then pre-cut (egg and toast!) by my dad...Poached eggs on toast is my way of proving I'm almost a grown-up now.

Real ICE CREAM post tomorrow.

16 July 2009

Oprah Burgers

Okay, really, they are turkey burgers. But they come to me via oprah.com. Apparently Oprah dedicated a show to sandwiches, and had Gayle drive across the country eating. Why oh why do I have to work a day job? That is my kind of tv, and sounds way better than James Frey confessionals and car give-a-ways.


They were not as epic as Oprah promised, although I did scale down the recipe for 3 and the proportion of stuff to burger was a little high, and I didn't have time to let them firm up in the fridge. But they were pretty tasty (served with apricot and jalapeño chutney) and I intend to re-attempt. Grilling next to them are eggplant and red peppers served with mint-cumin dressing that was pretty much the bomb.com, courtesy of Cook's Illustrated.

14 July 2009

Shrimp Tempura

Halifax may be satisfying my crustacean cravings, but the sushi, I miss it. Well there is sushi here, but it is unreasonably expensive compared to the sketchy/amazing places I frequent in Toronto. Also drunk sushi at 1am, not so much an option. So I made something I never before considered making at home. Tempura.


Crispy, battered, deep-fried-only worth it if you're eating there, the soggy lumps you get by delivery/take-out do not do this food of the gods justice.

Cook's Illustrated got me pretty close. Here is their take:

Shrimp Tempura (serves 4)
  • 3 quarts vegetable oil
  • 1 1/2 pounds colossal shrimp (8-12 per pound), peeled and deveined, tails left on.
  • 1 1/2 cups unbleached all-purpose flour
  • 1/2 cup cornstarch
  • 1 large egg
  • 1 cup vodka
  • 1 cup seltzer water
  • Kosher salt
1. Adjust oven rack to upper-middle position and heat oven to 200 degrees. In large, heavy Dutch oven (I used a wok) fitted with clip-on candy thermometer, heat oil over high heat to 385 degrees, 18-22 minutes.
2. While oil heats, make 2 shallow cuts about 1/4 inch deep and 1 inch apart on undershipe of each shrimp. Whisk flour and cornstarch together in large bowl. Whisk egg and vodka together in second large bowl. Whisk seltzer water into egg mixture.
3. When oil reaches 385 degrees, pour liquid mixture into bowl with flour mixture and whisk gently until just combined (it is OK if small lumps remain). Submerge half of shrimp in batter. Using tongs, remove shrimp from batter 1 at a time, allowing excess batter to drip off, and carefully place in oil (temperature should now be 400 degrees). Fry, stirring with the chopstick or wooden skewer to prevent sticking, until light brown, 2 to 3 minutes.


Using slotted spoon, transfer shrimp to paper towel-lined plate and sprinkle with salt. Once paper towels absorb excess oil, place shrimp on wire rack set in rimmed baking sheet and place in oven.
4. Return oil to 400 degrees, about 4 minutes, and repeat with remaining shrimp. Serve immediately.

Use the left-over batter/oil to fry up some vegetables, I went with rounds of sweet potato.
I was surprised at how well this turned out, it was actually pretty easy, if a bit finicky. But the vodka in the batter is key.

13 July 2009

DIY Thin Mints

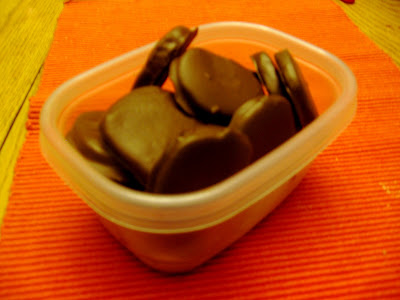
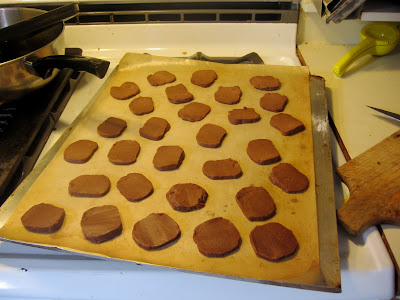
I was once a girl guide. Then my friend and I turned 12, got too cool and peaced. I was never a cookie selling champion but I could sure put them away. Thin mints are my favourite and I was psyched to see various successful attempts at recreation. I am using the recipe from Baking Bites, also featured on The Crepes of Wrath.

Thin Mints
from Baking Bites (my notes in italics)

Homemade Thin Mints
2 1/4 cups all purpose flour
1/4 cup cornstarch
6 tbsp unsweetened cocoa powder
1/2 tsp salt
1 cup white sugar
1/2 cup butter, room temperature
1/3 cup milk (any kind)
1/2 tsp vanilla extract
3/4 tsp peppermint extract (could be upped to 1 tsp)

In a small bowl, whisk together flour, cornstarch, cocoa powder and salt.
In a large bowl, cream together butter and sugar. With the mixer on low speed, add in the milk and the extracts. Mixture will look curdled. Gradually, add in the flour mixture until fully incorporated.
Shape dough into two logs, about 1 1/2 inches (or about 4 cm) in diameter, wrap in plastic wrap and freeze for at least 1-2 hours, until dough is very firm.
Preheat oven to 375F.
Slice dough into rounds not more than 1/4 inch thick - if they are too thick, they will not be as crisp (seriously, focus on your cutting, you also want them to be flat and all approximately the same thickness)- and place on a parchment lined baking sheet. Cookies will not spread very much, so you can put them quite close together.


Bake for 13-15 minutes (err on the less crispy side if you want them to taste authentic/max delicious), until cookies are firm at the edges. Cool cookies completely on a wire rack before dipping in chocolate.

Dark Chocolate Coating (2 logs, 2 rounds of baking-first round I went with nice quality dark chocolate, but found them a bit too intense. Round two I started with straight up milk chocolate with 30%cacao, but though the taste was awesome, the melting quality was not so great and they coated the cookies a little gloopily. So I went for a 2/3 milk chocolate, 1/3 dark chocolate, no butter mixture which worked out great)
10-oz dark or semisweet chocolate
1/2 cup butter, room temperature

In a microwave safe bowl, combine chocolate and butter. Melt on high power in the microwave, stirring every 45-60 seconds, until chocolate is smooth. Chocolate should have a consistency somewhere between chocolate syrup and fudge for a thin coating.
Dip each cookie in melted chocolate, turn with a fork to coat, then transfer to a piece of parchment paper or wax paper to set up for at least 30 minutes, or until chocolate is cool and firm.
Reheat chocolate as needed to keep it smooth and easy to dip into. (This part gets messy/awesome)

Makes 3 1/2-4 dozen cookies. Store them in the fridge or freezer if you like them extra crispy.

9 July 2009

Oatmeal Chocolate Chip Cookies

I have been reading The Omnivore's Dilemma by Michael Pollan lately, and everytime I am craving something sweet and might normally think about maybe grabbing some Reese's Pieces or gummies of any kind (fyi I have a bit of a candy problem, if you are enabler, stick with these kinds to be safe), I read the label and look for corn/derivatives from corn/generally get freaked out by all these mono/dextrose/acid sounding things in my "food", and justify baking another batch of cookies.

These are a classic, tasty and quick. It makes for excellent dough snacking as well.

Oatmeal Chocolate Chip Cookies recipe (originally from Cook's Illustrated)

Note on chocolate chips: Using fancy chocolate chips makes a huge difference in my opinion. My preferred brand is Ghiradelli's Semisweet Chocolate Chips, both for taste and the way they melt. I was almost out so this batch was half and half (the other half being plain old President's Choice), and I, for one, could taste the difference. Not my best work, but for quick and somewhat wholesome (extremely wholesome when I think about HFCS, antibiotics-loaded cows, and scary chemicals) cookies, these did the trick.

4 July 2009

Pesto makes everything better/My favourite sandwich


Food processor older than I am + Fresh Basil = Delicious Pesto


I used Mark Bittman's recipe from How To Cook Everything but it is seriously easy beyond belief, just process basil, pinenuts or other nuts (I used walnuts), garlic and olive oil. You can also use cheese if you want but I don't like to.

Mostly I made this pesto because it is the basis for what I consider to be the perfect sandwich. There is a small chain I love in Toronto called Sandwich Box, which is basically high-end Subway. I actually really hate Subway. The smell as soon as you go in is so overpowering and if I'm paying for someone else to make my lunch I don't like making that many choices. You're supposed to be an 'artist', use your judgement. Also choosing between the soggy veggies/cold cuts is not all that appealing. But Sandwich Box...I dream about it. You pick a bread, a spread, and three toppings from meats, vegetables and cheeses. Of course you could always choose more. And we are not talking slimy chicken terriyaki and wilted lettuce. No, no, my friend. Would you like some roasted garlic and cumin aoili? On fresh-baked rye, foccacia? Some caramelized onions and portobellos on that? YEAH. AND they pack it up in the cutest box and serve it with a side salad, after seasoning and toasting your sandwich.

This is a recreation of the sandwich I almost always get, prosciutto, brie and pesto on a baguette. But what, isn't that only two toppings? I thought you said three. Yeah but I don't feel like veggies on this one, although I was kind of disappointed not to get my three toppings worth. Until I realized I could just ask for double the brie. This sandwich is also reminiscint of one of my favourites from Spain a couple summers ago, serrano ham (they do fucking incredible things with pigs there) and brie panini.


Prosciutto, brie and homemade pesto on sourdough instead of baguette.

P.S. I finally got a summer job! I start on Monday but will try to keep up.